

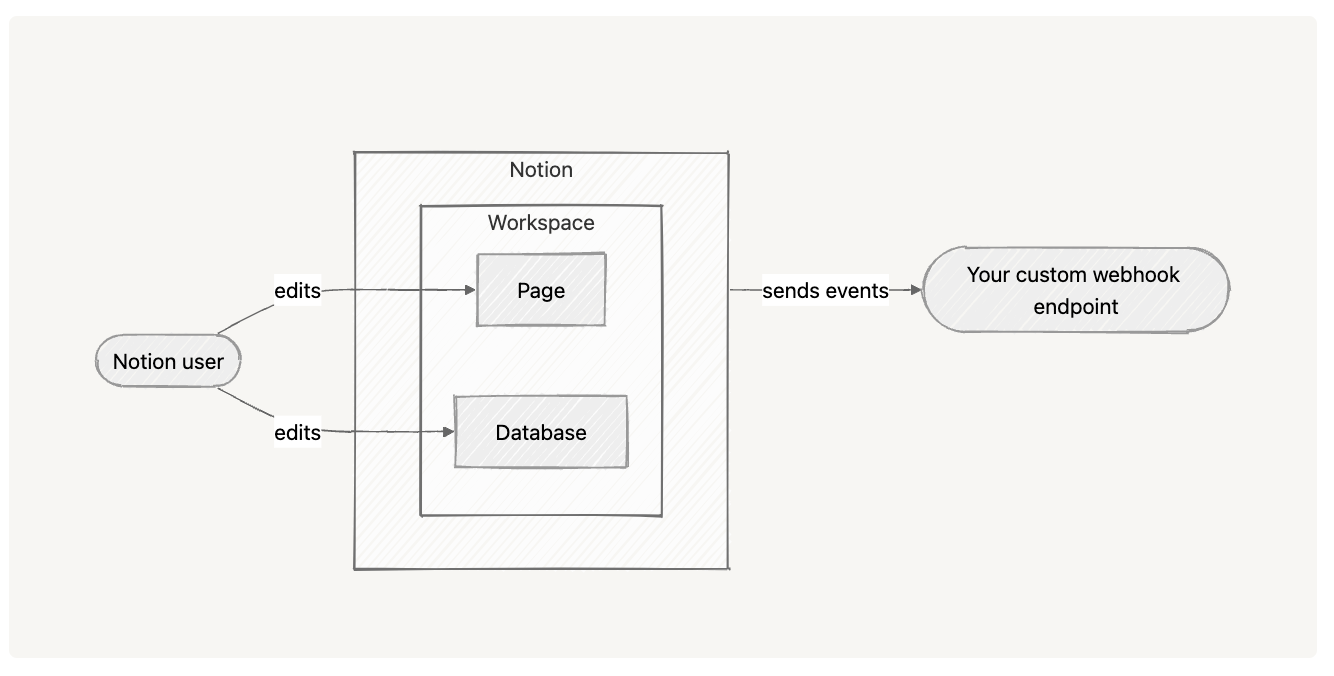
How webhooks work: A simple example
Let’s walk through an example from start to finish:1
Your connection is subscribed to
page.content_updated events.2
A user edits the title of a page in Notion.
3
Within a minute, Notion sends a webhook request to your configured endpoint.
4
The event payload includes metadata such as the page ID, the event type, and a timestamp.
5
Your server receives the event, verifies it, and calls the Notion API to fetch the updated title using the page ID from the event.
6
Your application updates its internal data or takes any other action you’ve defined.
Getting started with webhooks
Step 1 - Creating a webhook subscription
To receive webhook events, you’ll need to create a subscription through your connection settings. You’ll need to:1
Visit your connection settings.
2
Either create a new connection or select an existing one.
3
Navigate to the Webhooks tab and click + Create a subscription.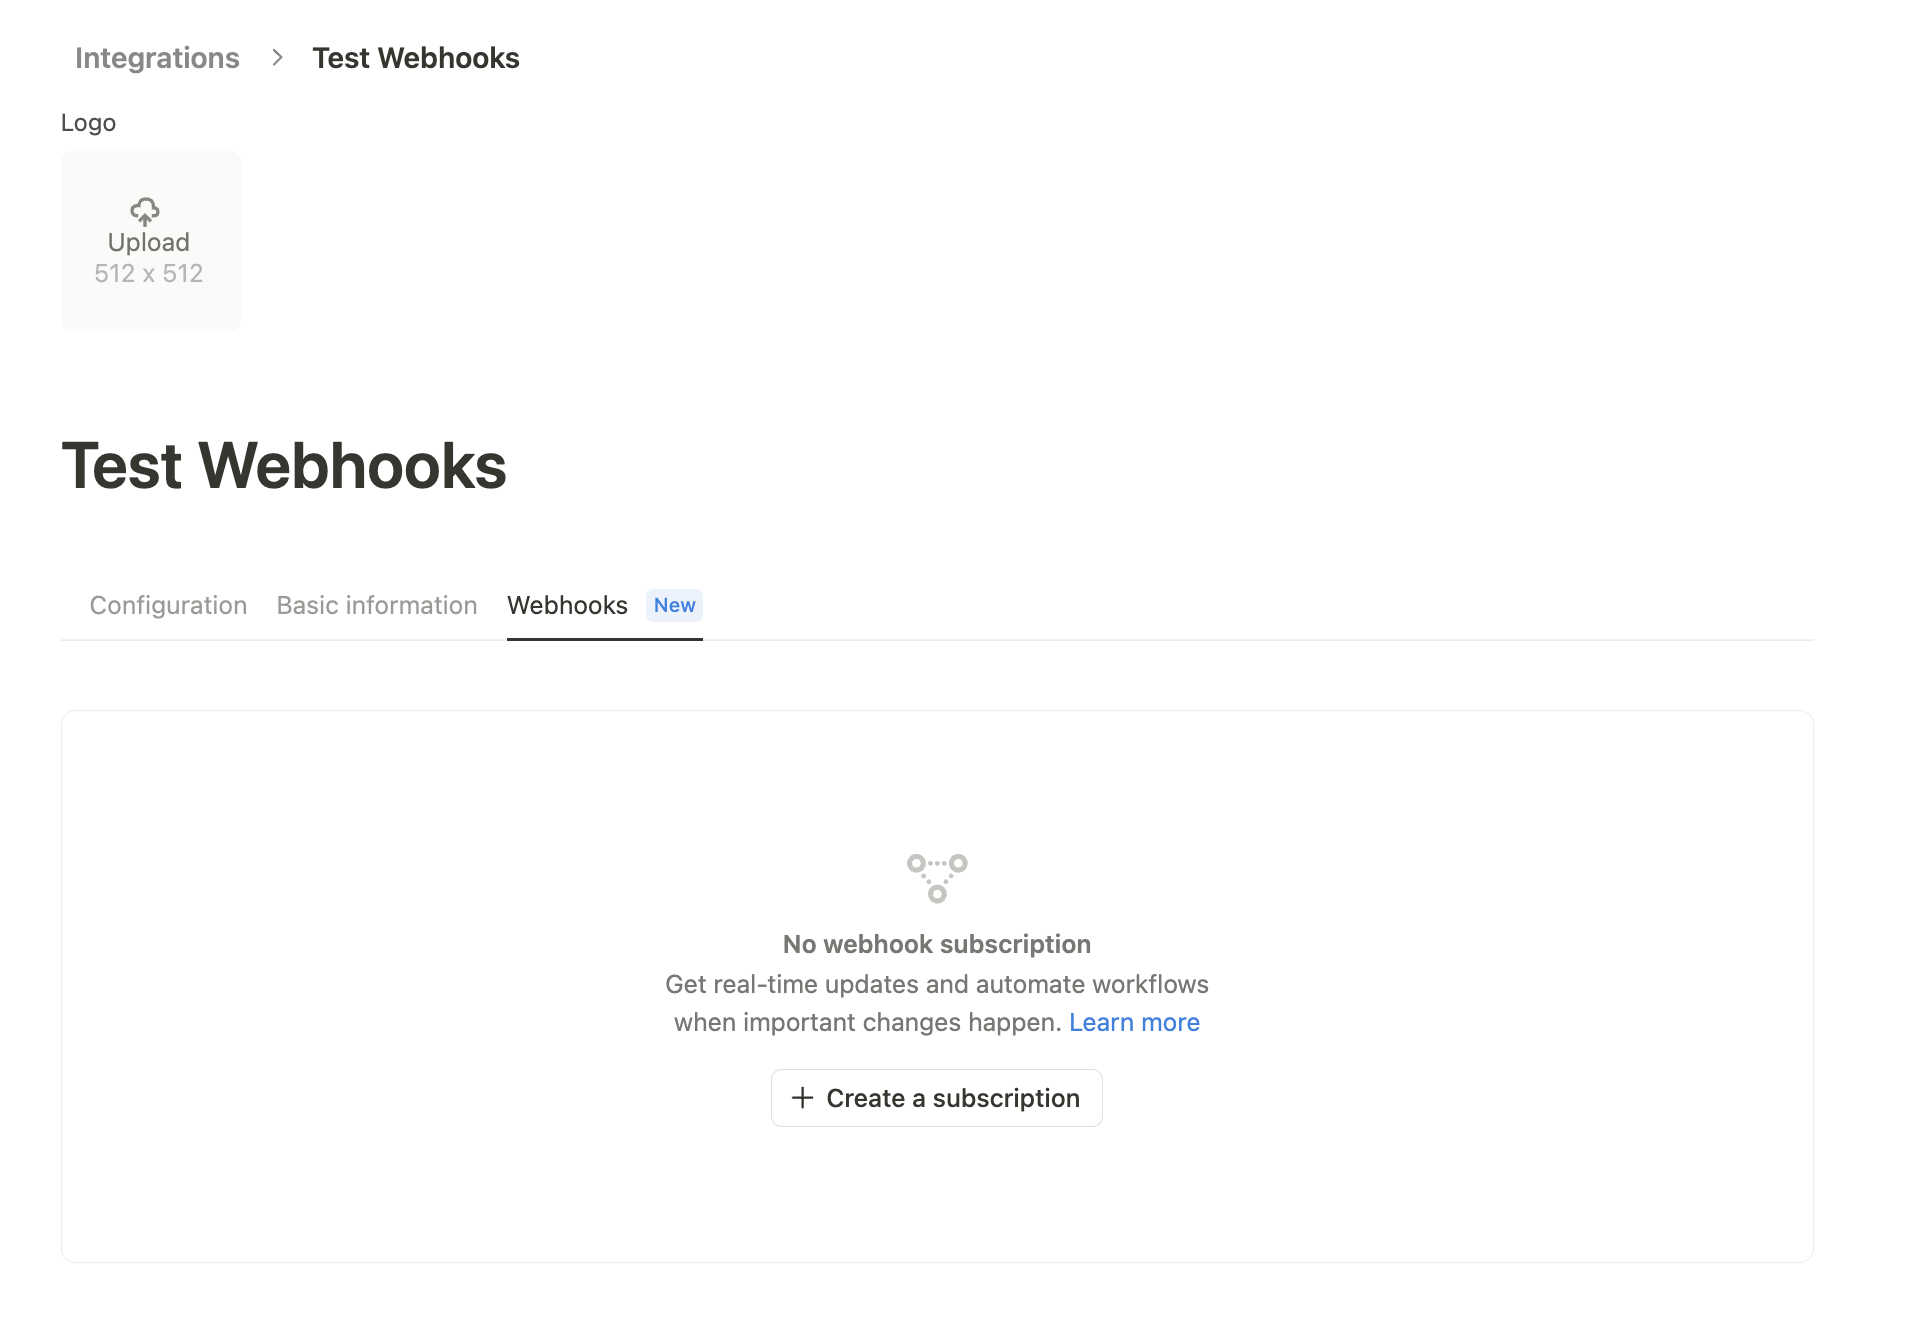
4
Enter your public Webhook URL — this is the public endpoint where you want Notion to send events. It must be a secure (SSL) and publicly available endpoint. Endpoints in localhost are not reachable.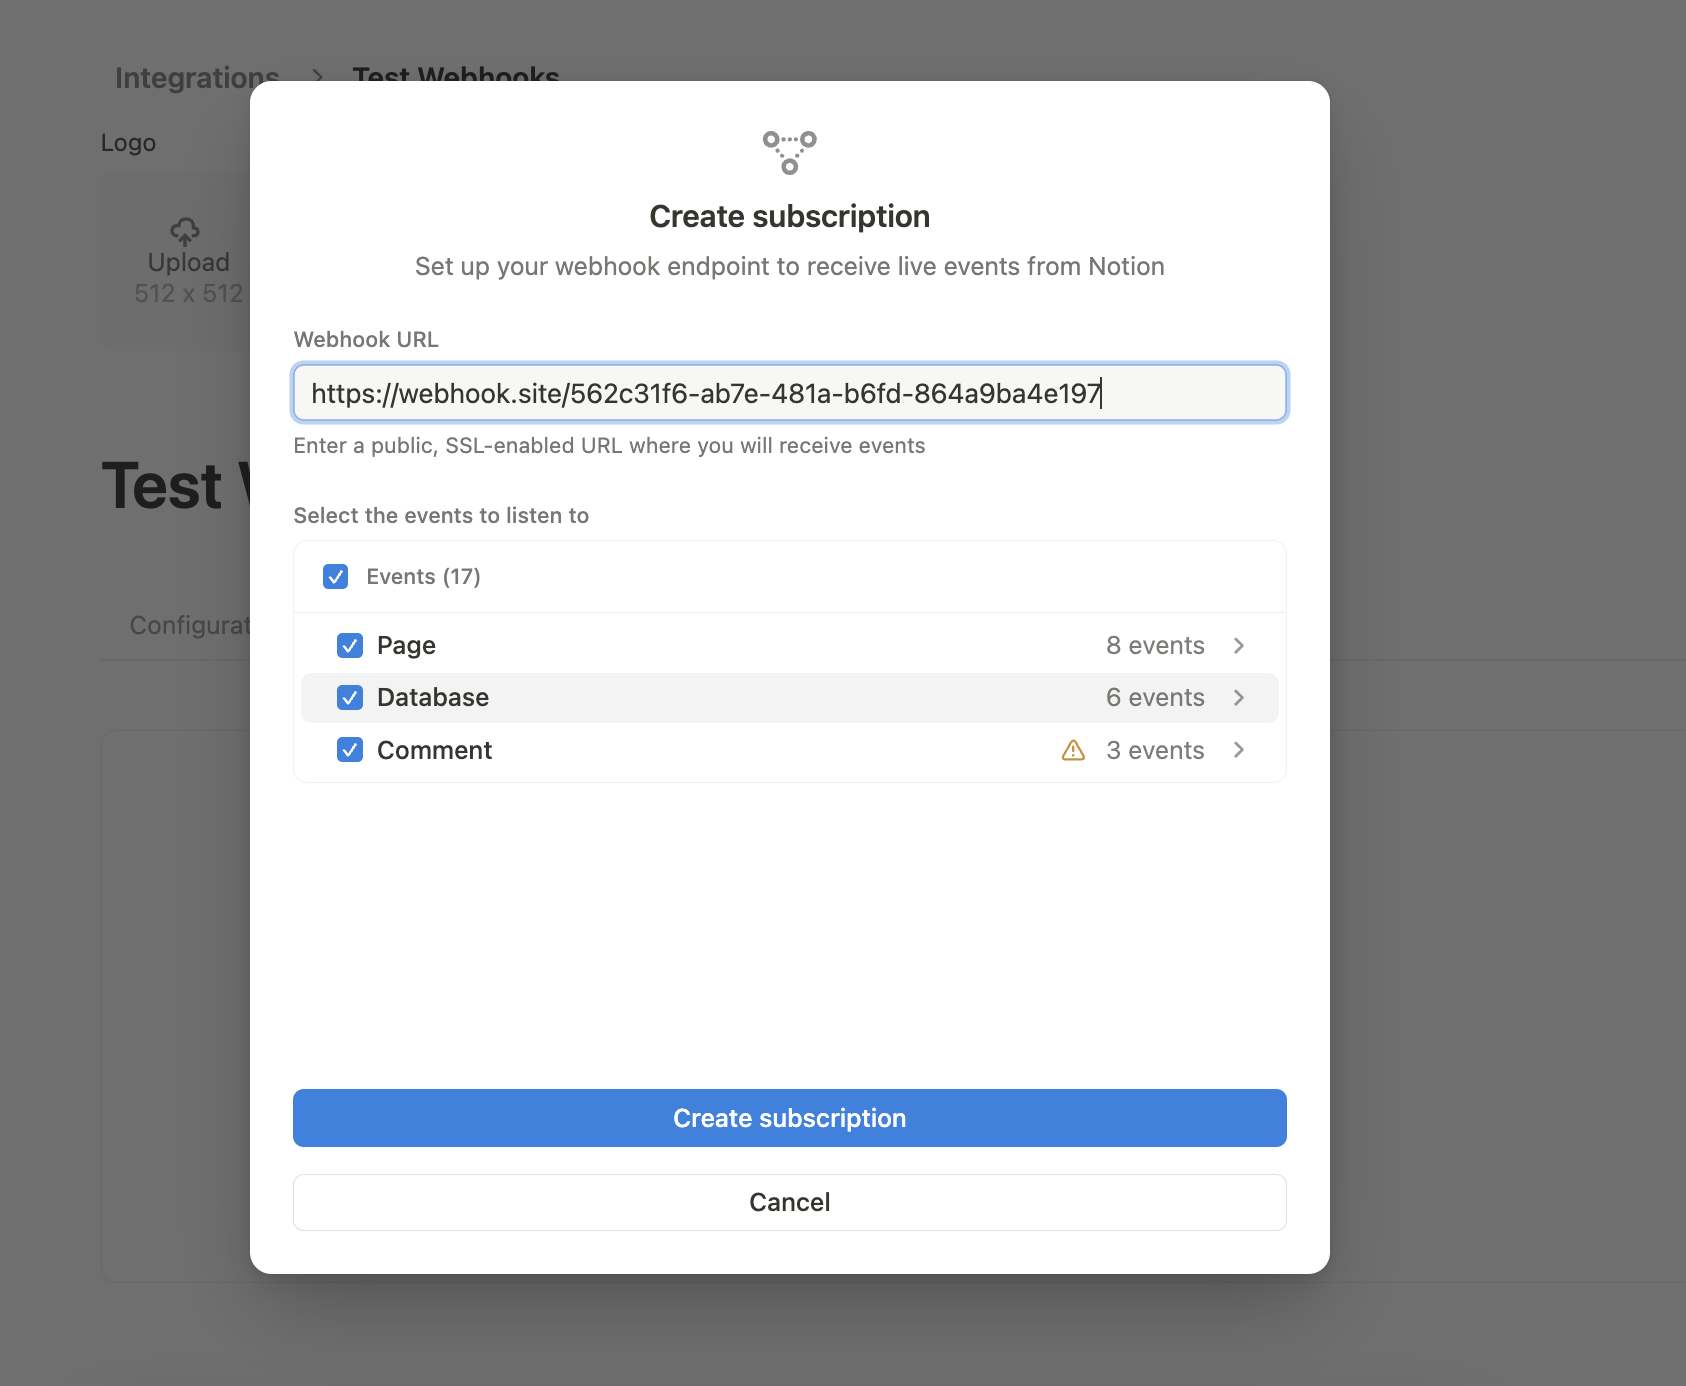
5
Choose which event types you’d like to subscribe to. You can modify these later if needed.
6
Click Create subscription.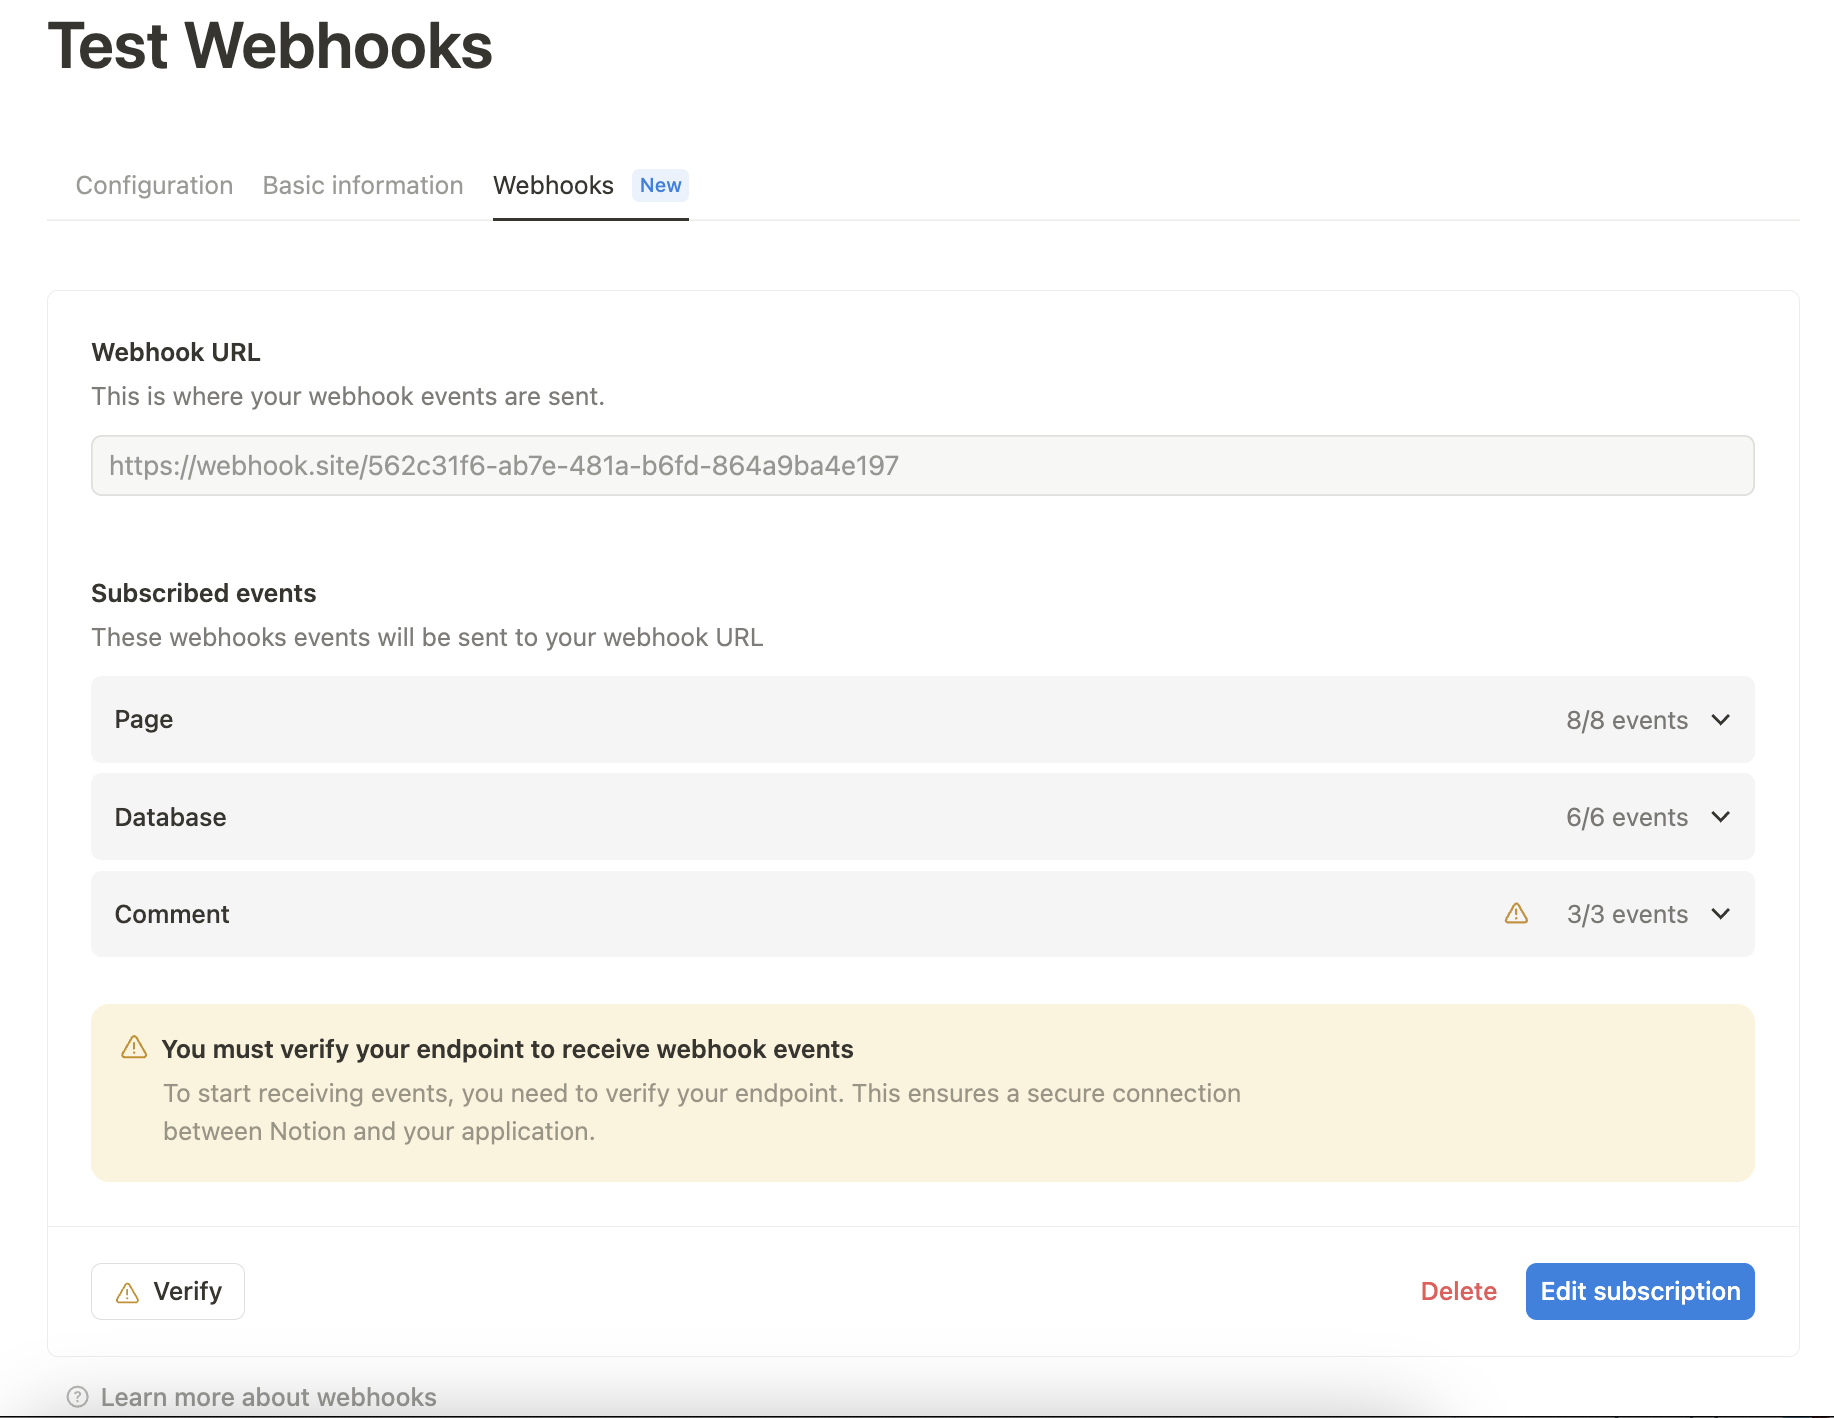
Step 2 - Verifying the subscription
When you create a subscription, Notion sends a one-time POST request to your webhook URL. The body of the request contains averification_token, which proves that Notion can successfully reach your endpoint.
Example payload with verification_token:
1
Inspect the incoming request at your endpoint and extract the
verification_token from the JSON payload.- (Optional): Securely store this token for payload validation setup later, in step 3.
2
Go back to the Webhooks tab within your Notion connection UI and click ⚠️ Verify on the bottom left of the page
3
Paste the 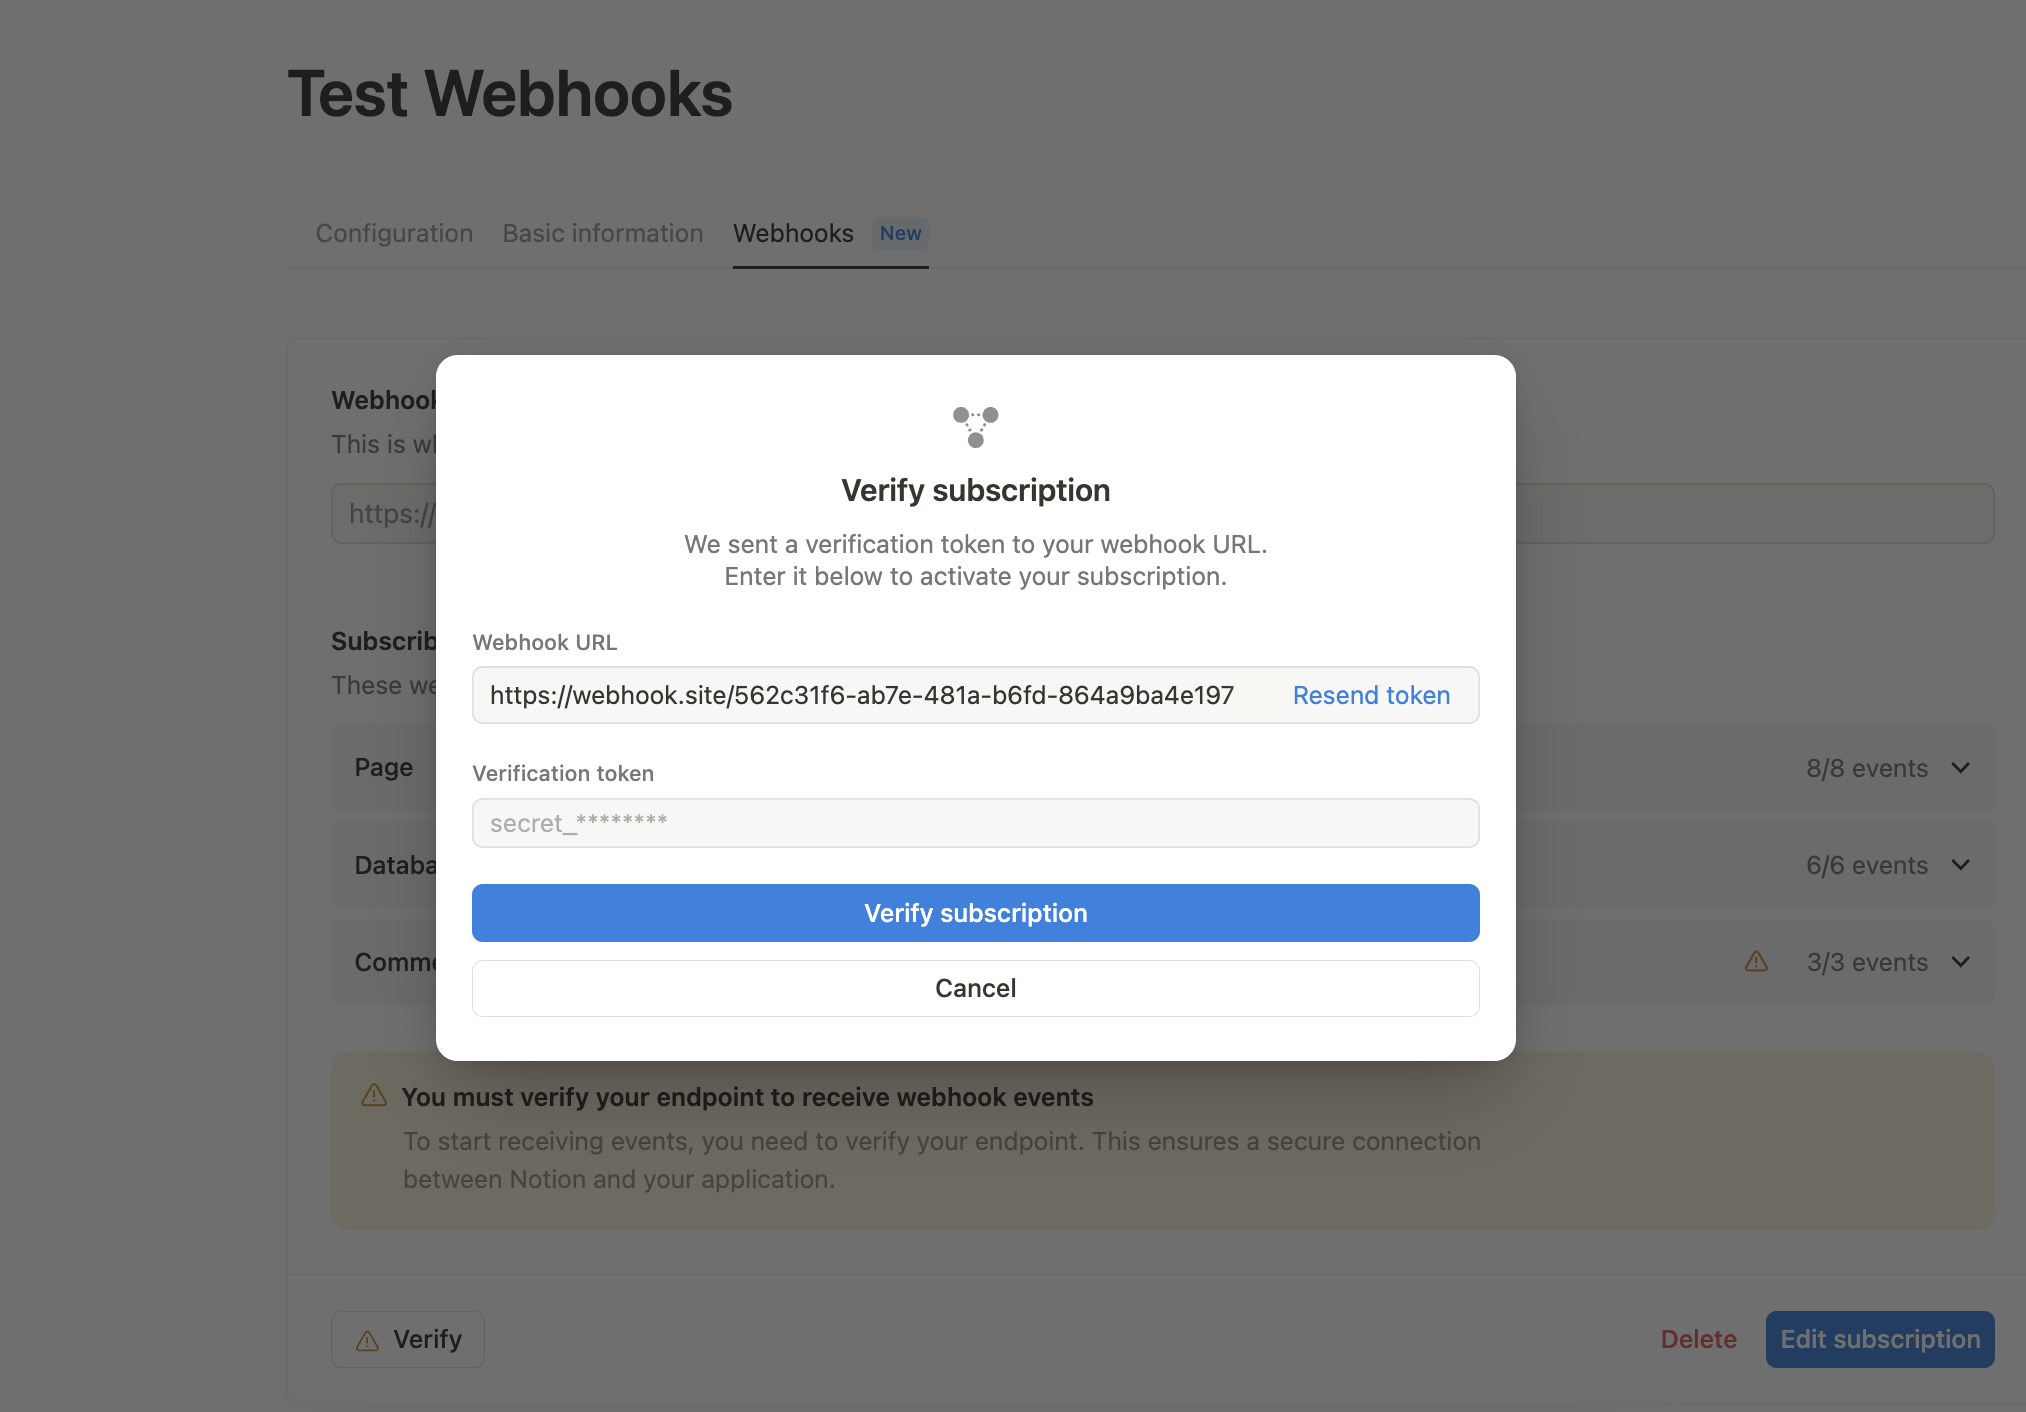
verification_token value into the form and click Verify subscription.verification_token, you can click Resend token from the webhook verification modal.Changing your webhook URL or event subscriptionsYou can only change the webhook URL before verification. After verification, if you need to change the URL, you must delete and recreate the subscription. You can change the subscribed events at any time.
Step 3 - Validating event payloads (Recommended)
To help ensure the security of your connection, Notion includes a cryptographic signature with every webhook event we send. This allows you to verify that the payload was sent by Notion and hasn’t been modified in transit. While payload validation is optional, we recommend implementing it for any production environment.Using a no-code or low-code platform?If you’re using a no-code or low-code platform (like Zapier, Make, or Pipedream), you may not have access to custom code for signature verification — and that’s okay. Validation is encouraged, but not required for webhooks to work.
How it works
In the previous step, Notion sent a one-timeverification_token to your webhook URL. You’ll use this token to verify the authenticity of all subsequent webhook events.
Every webhook request from Notion includes an X-Notion-Signature header, which contains an HMAC-SHA256 hash of the request body, signed with your verification_token.
Sample X-Notion-Signature from Notion:
verification_token along with the event’s payload to recompute the signature and verify the request’s authenticity. If they match, the payload is trustworthy.
Sample code for computing the signature and validating the webhook payload:
verification_token.
Testing your webhook subscription
Once your webhook subscription is set up and verified, it’s a good idea to test that everything is working as expected. Below are three common test scenarios you can try, each corresponding to a supported event type. These tests simulate typical content updates and help ensure your endpoint is receiving and processing events correctly.Test 1 - Change a page title
This test checks your webhook’s ability to handle aggregated events, which are delivered with a short delay to avoid sending redundant updates. You’ll need to:1
In your Notion workspace, add the connection to a page.
2
Change the title of that page.
3
Wait a minute or two because aggregated events like
page.content_updated are batched and may not be sent immediately.4
Check your server logs or webhook handler. You should receive a
page.content_updated event.5
Use the entity.id value from the payload to call the
retrieve a page endpoint and confirm the new title.Test 2 - Add a comment
This test checks event delivery for comments, which require specific capabilities. You’ll need to:1
In a page your connection has access to, add a new comment.
2
Your webhook should receive a
comment.created event within a few seconds.comment read capability in its configuration. You can confirm this by opening your connection’s Configuration tab and scrolling to the Capabilities section.
Test 3 - Modify a database schema
This test verifies that structural changes to databases are triggering events. You’ll need to:1
Open any database your connection is connected to.
2
Make a schema change — for example, add a new property (column), rename an existing one, or delete a property.
3
Your webhook should receive a
data_source.schema_updated (in the new 2025-09-03 API version) or database.schema_updated (deprecated after 2022-06-28 API version) event shortly after the change.Troubleshooting tips
If your webhook isn’t receiving events as expected, here are a few things to double-check. These are the most common reasons developers miss events during setup or testing.🔒 1. Check access permissions
Make sure the connection has access to the object that triggered the event. For example, if a new page is created inside a private page your connection doesn’t have access to, the event won’t be triggered.✅ 2. Confirm capabilities
Some event types require specific capabilities to be enabled for your connection. For instance, to receivecomment.created events, your connection must have the “comment read” capability selected. Without it, even if your connection has access to the page, the comment event won’t be delivered.
You can view and update your connection’s capabilities in the Capabilities section of your connection settings.
⏳ 3. Understand aggregated event timing
Not all webhook events are sent immediately. Some, like page.content_updated, are aggregated to reduce noise from frequent edits (e.g., typing, formatting, moving blocks). This is normal and helps group multiple rapid changes into a single webhook event. See Event Delivery for a deeper explanation.☑️ Confirm your subscription status
Even if everything else is configured correctly, your webhook won’t receive events unless the subscription is active. Head to the Webhooks tab under your connection settings and make sure your subscription is active. If the status shows as paused, pending verification, or if the subscription was deleted, events won’t be delivered to your endpoint.Related resources
- Event types & delivery — Full list of supported event types, payload structure, and delivery behavior.
- Webhook event reference — API reference pages for each webhook event type with payload schemas.