Why start with an internal connection?
We recommend starting with an internal connection. Internal connections let you focus on building with the API right away — you just need an API token to get started. There’s no OAuth flow to implement and no listing process to worry about. Everything stays within your workspace. If you later need your connection to work across multiple workspaces, you can always create a public connection and re-wire your code to use OAuth. If you only need a token for a user-owned script or CLI workflow, a personal access token may be faster. This quickstart uses an internal connection because it demonstrates a team-owned automation with explicit page sharing. In this guide, we’re going to build an internal Notion connection that creates a new database in your workspace via a web form.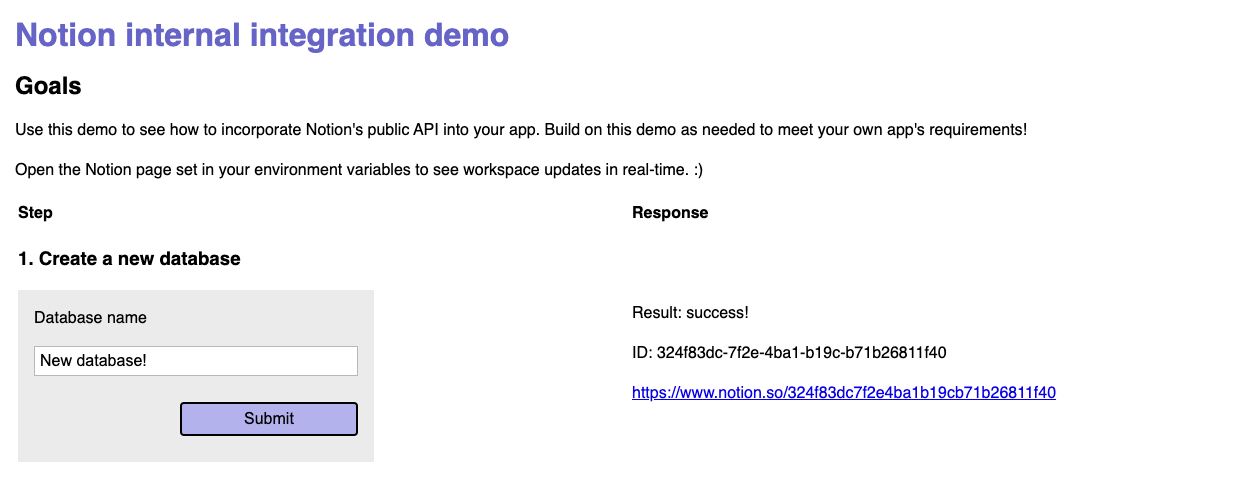
What to know before you start
Before diving in, here are a few essential things to keep in mind when working with the Notion API:- Versioning: Every request must include a
Notion-Versionheader. See Versioning for the latest version. - Rate limits: The API allows an average of 3 requests per second. If you exceed a rate limit, you’ll receive a
429or529response with aRetry-Afterheader. See Request limits. - Error handling: API errors return structured JSON with a
codeandmessage. See Status codes for the full list. - Pagination: List endpoints return paginated results. Use
start_cursorandhas_moreto iterate through pages. See the API introduction for details. - Token security: Never store your API secret in source code or version control. Use environment variables or a secret manager. See Best practices for handling API keys.
What you will build
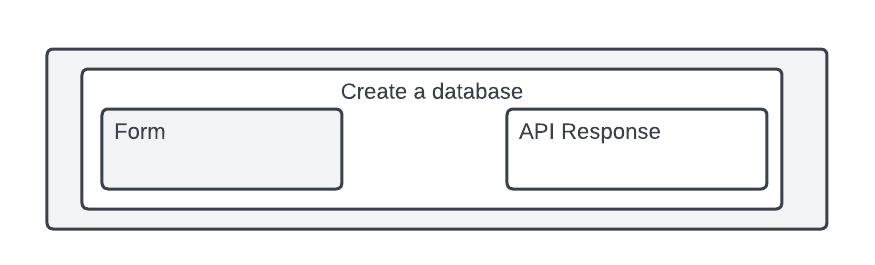
This guide will demonstrate how to build an HTML form that will create a new Notion database when submitted. By the end of this guide, we’ll have a functional app that looks like this:
- Add a new page to the database
- Add content to the new page
- Add a comment to the page content
Requirements
To follow along with this guide, you will need:- A Notion account.
- To be a Workspace Owner in the workspace you’re using. You can create a new workspace for testing purposes otherwise.
- Knowledge of HTML and JavaScript. We’ll use Express.js for a server, as well.
- npm and Node.js installed locally to use the Notion SDK for JavaScript and Express.js
SDK usage is recommended, but not requiredThe sample code shown below uses the Notion SDK for JavaScript to make public API requests.Using the Notion SDK for JavaScript is not required to build a Notion connection, but many JavaScript developers prefer it due to its ease of use.
Create your connection in Notion
The first step is to create a new internal connection in Notion’s Developer portal.In the Build section of the sidebar, select Internal connections, then click Create a new connection.
Get your access token
API requests require an installation access token to be successfully authenticated. Visit theConfiguration tab to get your connection’s installation access token.
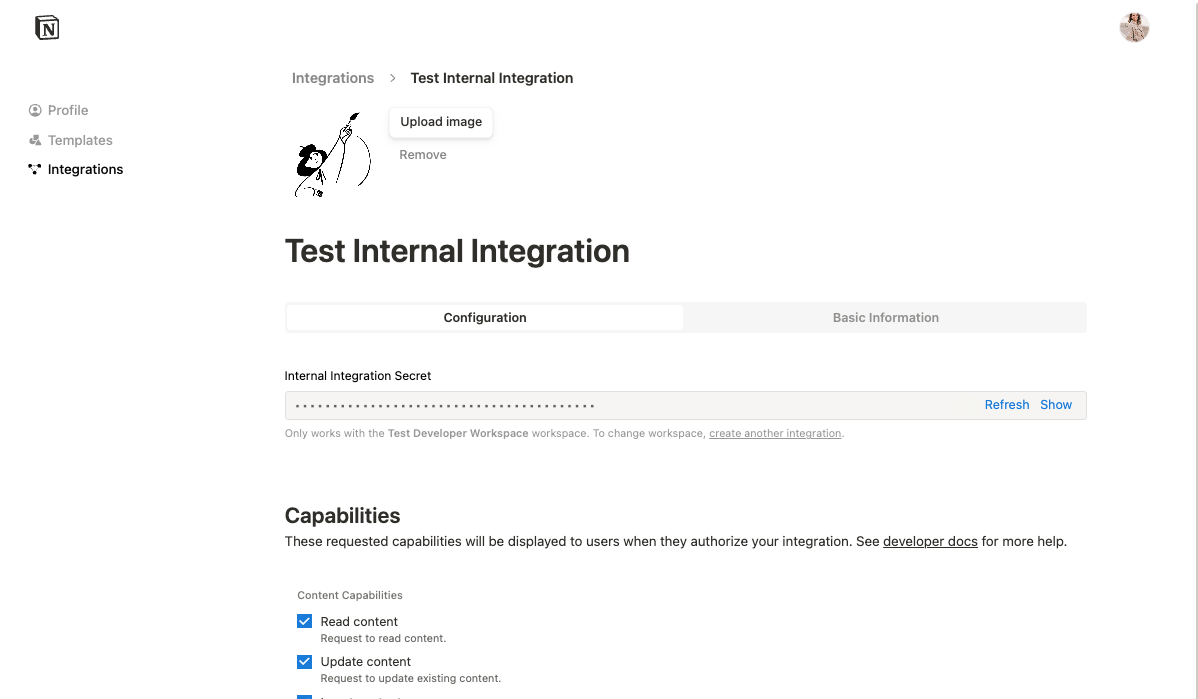
Never share your installation access token!Any value used to authenticate API requests should always be kept private. Use environment variables and avoid committing sensitive data to your version control history.If you do accidentally expose it, remember to refresh your installation access token.Learn more: Best practices for handling API keys
Give your connection page permissions
The database that we’re about to create will be added to a parent Notion page in your workspace. For your connection to interact with the page, it needs explicit permission to read/write to that specific Notion page. To give the connection permission, you will need to:
Your connection can now make API requests related to this Notion page and any of its children.
To learn more about how internal connection permissions work — including the bot identity model — see the Internal connections guide.
Setting up the demo locally
In this example, we’ll have three key files:index.html, which will contain our client-side HTML.client.js, which will contain our client-side JavaScript code.server.js, which will contain our server-side JavaScript code. This file contains all the endpoints to make requests to Notion’s public API, as well as to serve theindex.htmlfile. (More on that below.)
Various examples are availableThis connection includes frontend code, but connections can be server-side only, as well. See more examples of different connection use cases in GitHub.
Clone demo repo
To run this project locally, clone the repo and install its dependencies (Express.js, dotenv, and Notion’s SDK for JavaScript):Shell
Environment variables
In your.env file, add the following variables:
.env
NOTION_KEY, as well as a page ID (NOTION_PAGE_ID) for the page that you gave the connection permission to update.
How database IDs workWhen using the API to create a database, the parent of a database must be a Notion page or a wiki database. To get the ID of the page, locate the 32-character string at the end of the page’s URL.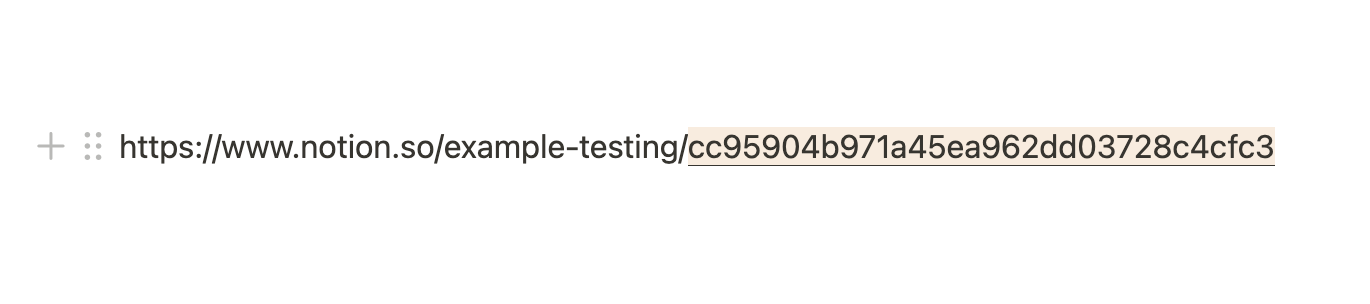
.env to your .gitignore file to ensure you don’t accidentally share these values.
Running the project locally
To run this project locally, you will need to enter the following command in your terminal:Creating a new database
Step 1 - Build the form
In ourindex.html file, we need a form for the user to create a new database and an area for the API response to be displayed. This is how the user will initiate a Notion API request.

<body>, notice the <form> element and an empty table cell with the ID dbResponse. The latter is where we’ll append the Notion API response information.
The database form includes two inputs:
- A text input for the database name
- A submit input to submit the form
client.js file is included in the document’s <head> tag, which allows us to apply client-side JavaScript to interact with these HTML elements.
Step 2 - Handle the submission
Inclient.js, we can write a function to describe what should happen when the database form is submitted. In short, we want to make a request to server.js to then make an API request to Notion. The actual Notion API request will happen server-side to avoid exposing our API secret in the client. (In other words, it’s more secure!)
getElementbyId().
Next, we attach an async function to the onsubmit event that will make a request to our local server’s /databases endpoint. (This endpoint will be described below in our server.js code.) The function is asynchronous because we need to wait for a response from our server before proceeding.
The response is then appended to our index.html document. (More on this below.)
Step 3 - Set up the Notion SDK
Let’s start by looking at ourserver.js file without the Notion-related endpoints:
/ (e.g., localhost:<port>/) and respond with the index.html file. That’s how the app knows to render our index.html code when the server is started.
To use the SDK, we import it at the top of server.js. We also initialize a new Notion Client instance and set the auth option to the Notion API secret already set in the environment variables:
The SDK automatically sets the
Notion-Version header on every request, so you don’t need to include it manually. If you’re making requests without the SDK, you’ll need to set this header yourself. See Versioning for details.Step 4 - Send the API request
Staying inserver.js, we can add the following code that will be invoked when the database form makes a POST request to /databases:
app.post() indicates this endpoint is for POST requests, and the first argument ("/databases") indicates this function corresponds to requests made to the /databases path, as we did in our client-side code above.
Next, we can actually interact with the Notion API.
To create a new database, we’ll use the Create a database endpoint:
server.js , not client.js.)
In this example, the title of the database should also be set. The title was provided in the form the user submitted, which we can access from the request’s body (request.body.dbName).
client.js:
client.js).
Step 5 - Display the response
Let’s first look at an example of the object the/databases endpoint responds with, which includes the database object that gets returned from the Notion API when we create a new database:
data.id). The ID will be required to make API requests to the Create a page endpoint, which is the next form in our completed demo’s UI.
Knowing this JSON structure, let’s now look at how appendApiResponse() works:
appendApiResponse(res, form) accepts two parameters: the response (shown above) and the HTML element where we will append the response — in this case, an empty table cell next to the database form.
In this function, we first add a paragraph element to show the response message (i.e., whether it was a success or the error).
<a>) tag. This allows the user to visit the database directly in Notion.
url property, which is why we check for it.)
Once this is done, our HTML document is updated and the form submission is officially complete.
Testing the feature
Let’s see the final results of testing this new feature:
Wrapping up
This guide demonstrated how to use Notion’s public API (via the Notion SDK for JavaScript) to build an internal connection. With this demo app, users can programmatically create a new database in their Notion workspace by filling out a form in the app UI and making a request to Notion’s public API — the Create a database endpoint. As a reminder, this example includes client-side code to allow for user interactions via a GUI (graphical user interface). Notion connections do not require a UI, however. What you build is completely up to you! To see examples of server-side-only connections, test out the sample apps in the SDK’s GitHub repo.Next steps
Internal connections
Learn how internal connection permissions and authentication work.
Public connections
Expand to multiple workspaces with OAuth 2.0.
Authorization
Implement the full OAuth flow for public connections.